Sewing Like A Pro
Blog

How to Replace a Zipper Slider: A Step-by-Step Guide
Have you ever found yourself frustrated by a broken zipper on your favorite jacket or pair of jeans? The struggle of trying to zip up only to have the slider come off or the teeth refuse to align can be all too familiar. It's a challenge many of us have faced—struggling with zippers, wrestling to replace sliders, and feeling daunted by the prospect of a zipper replacement.
However, fear not! In this guide, we'll navigate through the maze of zipper pull replacement together, demystifying the process and empowering you to conquer your zipper woes with confidence. Let's dive in and unlock the secrets to seamless zipper slider replacement!
Alright? Let's dive in.
If you are more of a visual learner, watch my YouTube video about zipper slider replacement below.
Step 1: Understanding Zipper Gauges
Before diving into the replacement process, it's crucial to understand zipper gauges. Zippers come in different sizes, and the width of the teeth varies accordingly. While I won't delve into the technicalities of gauge measurements, ensuring that the new slider matches the gauge of your zipper teeth is essential. Look for a slider where the teeth can smoothly pass between the two edges on either side of the bottom of the slider.

This will mean that it is the correct gauge. If the teeth wiggle around in between the guides, they may not mesh together properly, and your zipper will not close. If the teeth are too tight, opening and closing the zipper will be very difficult. The proper gauge teeth will fit between the guides on the pull without extra room.
Step 2: Assessing the Zipper Type
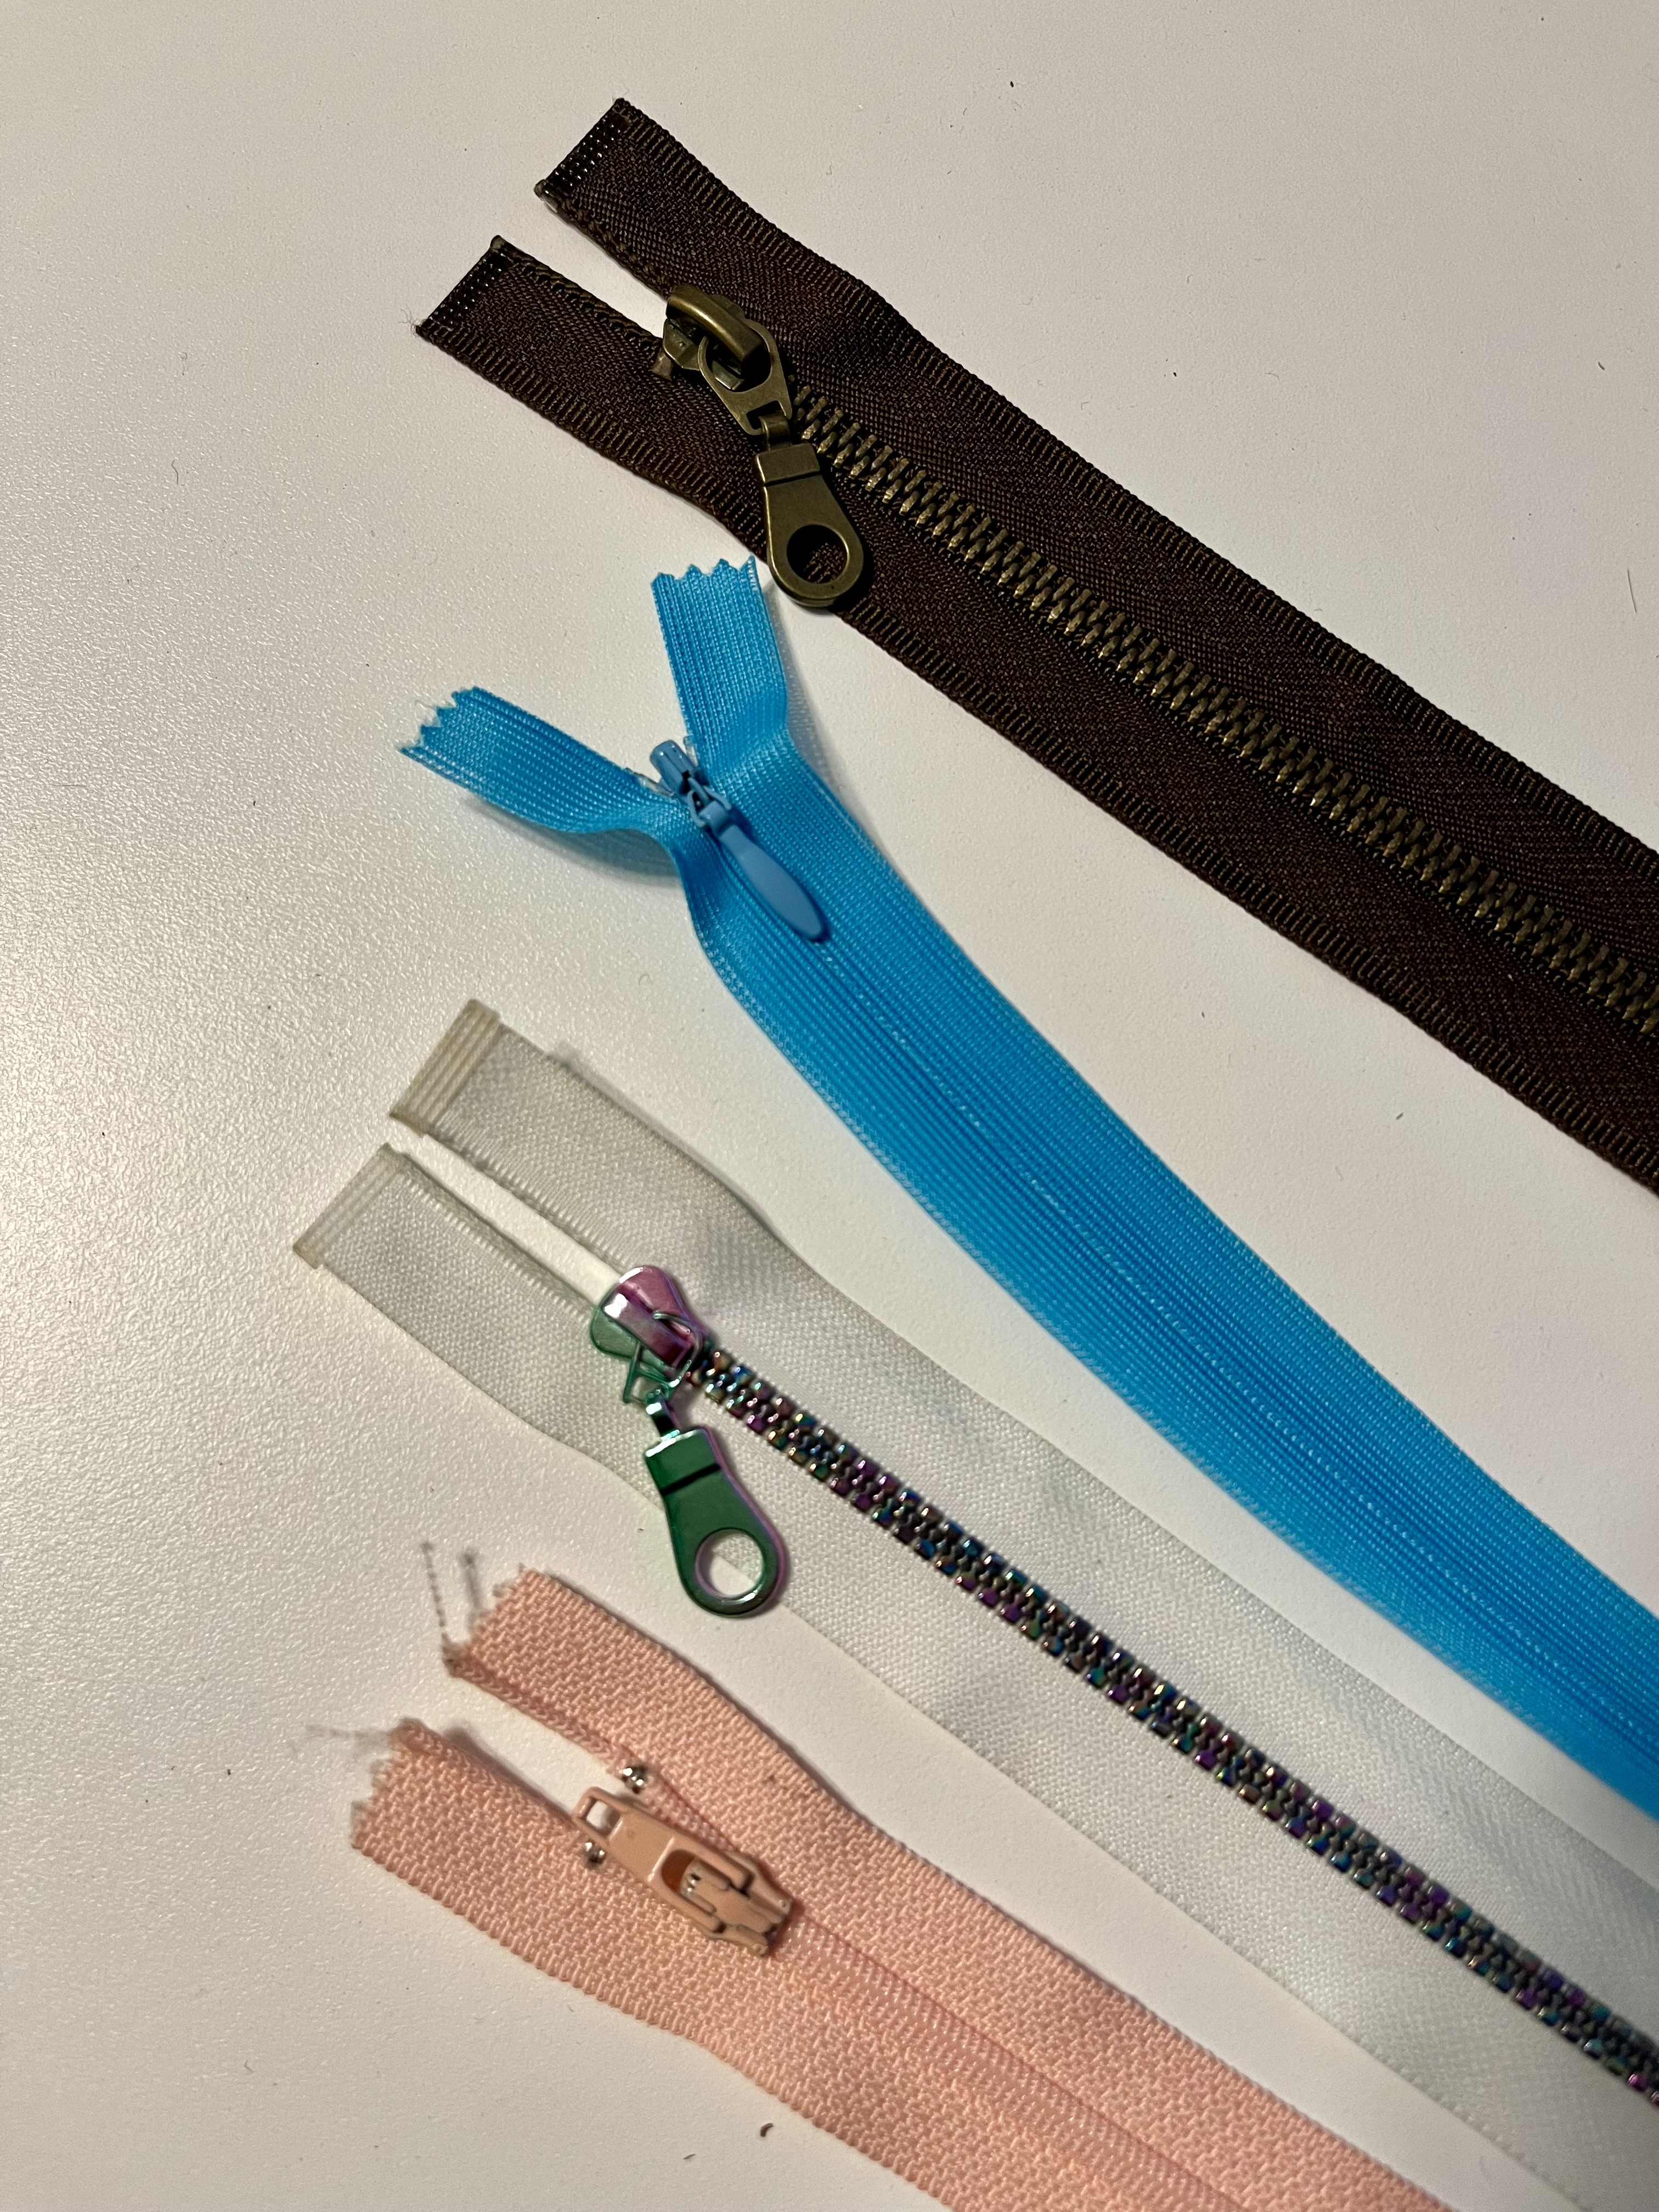
Next, assess the type of zipper you're working with. Is it a separable zipper or a closed-end zipper? This distinction will impact the replacement process. I have listed type specific tips at the bottom of this blog post.
Step 3: Removing the Zipper Stops
Regardless of the zipper type, you'll need to remove the existing zipper stops before replacing the slider.

Use pliers to carefully bend and remove the stops without damaging the zipper teeth. If your zipper has plastic zipper stops you will need to break them off and replace them with an alternative option.
Step 4: Replacing the Slider
Once the stops are removed, slide the new slider onto the zipper track.
Step 5: Testing and Adjustments
Before finalizing the replacement, test the zipper to ensure smooth operation. Ensure it glides smoothly, and securely closes the zipper. Make any necessary adjustments to ensure proper alignment and functionality.
Step 6: Finishing Touches
If the original zipper stopper is intact, you can reuse it by clamping it back in place. Otherwise, before purchasing new zipper stops you can also consider creative ways to finish off the end of the zipper, such as using fabric or stitching.
Would you like some type specific tips?
For Separable Zippers:
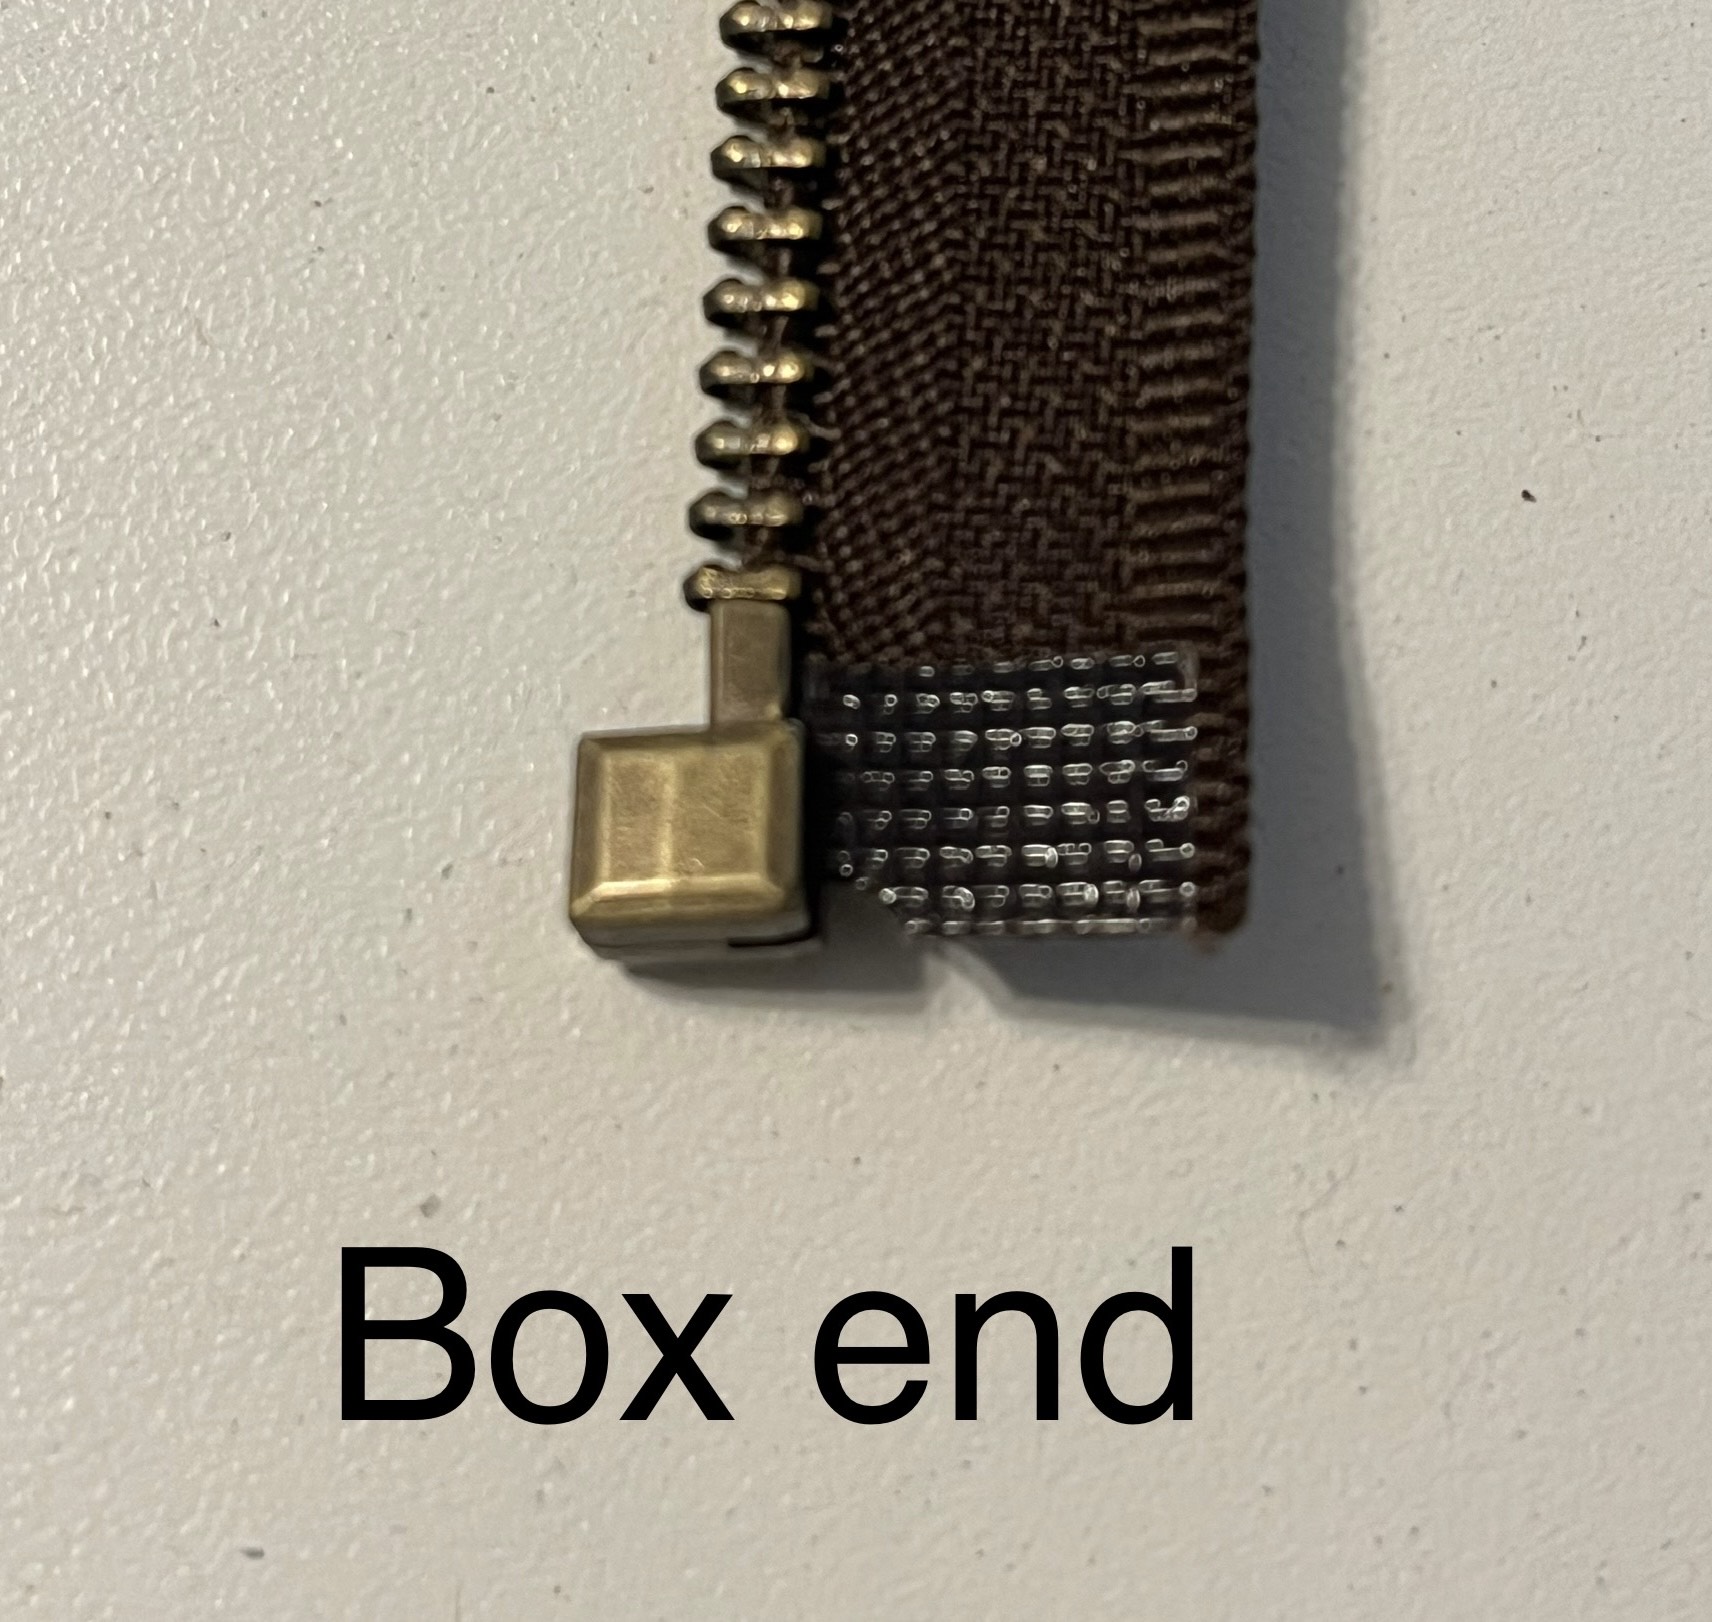
Begin by removing the zipper stop at the top of the zipper on the side with the box end. Using pliers,

gently pry apart the sides of the zipper stop to loosen and remove it.
Replace the slider by sliding it onto the zipper track. Ensure the teeth align properly with the new slider by test closing it part way.
Replace the zipper stop to secure the slider in place.
For Closed-End Zippers:
If your zipper is zipped closed, removing and replacing the slider is relatively straightforward. remove the stops on both sides being careful not to accidentally open the zipper. Slide the new slider onto the top of the zipper track.
However, if the zipper is open, replacing the slider can be more challenging. The teeth must be aligned properly below the slider, which can be tricky without the zipper being closed. It is also a bit of a battle to slide the zipper pull over the open teeth as you work it down. It's similar to when a zipper splits open below your slider and you have to work it down to the bottom so that you can close it again. In this case it is often easier to go from the bottom up. Start by removing the zipper stopper at the bottom, you may need to unstitch the bottom of your zipper to get at it. It is also often difficult to remove the bottom stop without overbending it so you may end up needing a new one or using an alternative finish on the end. Once you have the stopper off, slide the new zipper sider on ensuring that the teeth at the bottom are aligned otherwise the top of your zipper will be offset. Secure the end of the zipper with a zipper stop or another method so that the zipper won't be able to open up from the bottom and the zipper pull won't accidentally slide off when it is unzipped.
For Invisible Zippers:

For invisible zippers, the process is similar. However, the easiest method is typically to slide the new zipper pull on from the bottom. The zipper stop on invisible zippers is usually melted together teeth. This means that to remove it you will need to cut off the bottom of the zipper. This will only work if the zipper is long enough that you can secure the end inside the garment even after removing the stop portion of the zipper.
Master zipper slider replacement & Unlock Your Creativity
Replacing a zipper slider doesn't have to be daunting. By following these step-by-step instructions and considering the type of zipper you're working with, you can easily tackle zipper repairs and upgrades. Remember, mastering zippers opens up a world of possibilities in garment construction and repair. Don't let zippers be a barrier to your creativity—embrace them with confidence!

